
Making your own herbal tinctures at home can be a fun and rewarding process. With just a few basic ingredients and some simple steps, you can create powerful remedies tailored to your specific needs. In this guide, we’ll explore the essential components and the easy steps to craft your own tinctures.

Gathering Your Ingredients
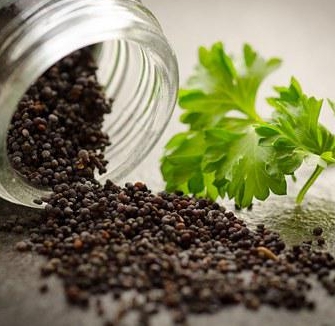
Begin your journey by selecting the right herbs for your tincture. Familiarize yourself with the properties of each herb, including their medicinal benefits and flavors.
You can choose from a variety of herbs such as chamomile for relaxation or ginger for digestive support. Understanding the purpose of each herb helps you tailor your tincture specifically to your needs.
When sourcing herbs, consider going for fresh or dried options. Ethical sourcing methods include growing your own herbs or purchasing from local farmers or markets. This not only ensures quality but also supports your local economy.
Don’t forget to gather some basic tools! You’ll need a clean glass jar for mixing, a strainer for extracting, and dark glass bottles for storing your finished tinctures. These simple items will help you make the process easier.
Overall, the key to gathering your ingredients is preparation. Take your time to research and plan, allowing you to create tinctures that are not only effective but also satisfying to make.
Choosing the Right Alcohol
Choosing the right alcohol is crucial for making effective herbal tinctures. The alcohol acts as the extracting agent, drawing out the active compounds from the herbs.
Opt for high-proof alcohol with a minimum of 40% ABV (80 proof). Vodka is a popular choice due to its neutral flavor, but you can also use brandy or rum for added taste. Each type of alcohol will impart different flavors to your tinctures.
It’s also important to consider the purpose of your tincture. For example, if you’re making a tincture for respiratory support, choosing a flavored alcohol might enhance its effectiveness and palatability.
Moreover, the alcohol content plays a vital role in extraction. While higher proof alcohol extracts more properties, lower proof options might work better for delicate herbs. Understanding your herbs will help you make an informed choice.
In conclusion, the right alcohol can enhance both the flavor and effectiveness of your tincture. Consider your preferences and needs, and you’ll be well on your way to crafting an exceptional product.
Preparing Your Herbs
Preparation of herbs is an essential step in creating potent herbal tinctures. Proper drying and chopping methods can significantly impact the extraction process.
Start by first cleaning your herbs thoroughly to remove any dirt or impurities. Use energetic but gentle motions to avoid bruising delicate leaves.
If you’re working with fresh herbs, consider air-drying them in a cool, dark place for a few days until they feel papery and crisp. For dried herbs, ensure they are stored correctly to maintain potency.
Chopping your herbs into smaller pieces increases the surface area, allowing for better extraction of beneficial compounds. Use a clean, sharp knife for this process, taking care to chop uniformly.
Once prepared, weigh your herbs and record the amount. This not only keeps your process consistent but ensures accuracy when mixing herbs with alcohol.
Mixing and Steeping
Now it’s time for the exciting part—mixing your prepared herbs with alcohol! Combine your herbs and alcohol in a clean glass jar, making sure the herbs are fully submerged.
A common ratio is 1 part herbs to 2 parts alcohol, but this can vary based on the herbs you select and their potency. Flavorful herbs might require less alcohol, while more robust ones may need more.
After combining, seal the jar tightly and give it a good shake. This helps to integrate the herbs and alcohol, enhancing the extraction process.
Now it’s time to let the mixture steep. Place the jar in a cool, dark place and allow the tincture to steep for a minimum of 4-6 weeks. During this time, shake the jar gently every few days to aid extraction.
Be patient! The longer you steep, the more potent your tincture will be. After the steeping period, your tincture will be ready for the next step—straining.
Straining and Storing Your Tincture
Once the steeping period is over, it’s time to strain your tincture. Start by setting up a fine mesh strainer or cheesecloth over a clean bowl or jar.
Pour your tincture mixture through the strainer, allowing all liquid to pass through while trapping the solid herb particles. This step is essential for ensuring a clean, smooth tincture.
Once strained, you can gently press the herb material to extract any remaining liquid. Make sure to do this carefully, as excessive pressure may introduce sediment back into your tincture.
Now that you have your liquid tincture, transfer it into dark glass bottles for storage. Dark glass protects your tincture from light, preserving its potency over time.
Store your tinctures in a cool, dark place, and remember to label each bottle with the date and the contents. Proper storage can extend the shelf life of your herbal tinctures for one to two years.
Embrace Your Herbal Journey
Creating herbal tinctures at home is not only a practical skill but also a wonderful way to connect with nature and enhance your wellness routine. By following these simple steps, you can enjoy the benefits of herbal remedies in a convenient form. Dive into the world of herbalism and experience the satisfaction of your own homemade tinctures!
Browse by category
- Aphrodisiacs
- Aromatherapy
- Astrology & Magic
- Ayurdeva
- Botany Foraging & Gardening
- Chakras
- Digestion
- Earth Connection
- Energetics
- Flower & Gem Essences
- Folk Traditions
- Herbalism & Holistic Health
- Immune Support
- Materia Medica
- Mushrooms
- Nutrition
- Seasonal Living: Autumn
- Seasonal Living: Moon Cycle
- Seasonal Living: Spring
- Seasonal Living: Summer
- Seasonal Living: Winter
- Skin & Body Care
Don’t Miss a Thing!
Enter your email below to be the first to know about sales, new products and tips for taking care of your pieces.